Many Yamaha outboard motor owners live in climates where they are taken out of service for the winter months, which means winterizing their outboards is a must.
Winterizing your outboard motor is one of the most important maintenance you can perform as a boat owner. It ensures safe boating in the spring, and also helps to keep your outboard(s) performing well. Making sure that your boat and its engines are properly cleaned and cared for also plays a role in protecting and preserving marine ecosystems.
We always recommend having your engine winterized by a certified Yamaha dealer if possible, but our engines are designed to make the process easy enough for owners to do the job themselves. To help you with DIY winterization, we asked Pete Reils, a certified Yamaha technician at Garden State Marina in Pt. Pleasant, New Jersey to provide steps on how you can winterize your engine(s) yourself.
For more resources, here is a how-to video about winterization.
To follow how Pete does it, keep reading.
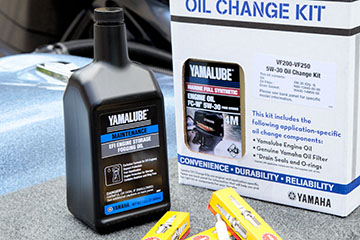
Before you get started, put together a checklist of everything you’ll need and be sure you have the proper Yamaha lubricants, additives and filters for the job. A list is available in your owner’s manual and the correct amount of engine oil for your four-cylinder model can be found next to the oil fill cap under the engine cowling.
Pete places a piece of plastic tubing as an extension over the rubber tube to direct the oil into the pan and lowers the engine using the trim switch on the starboard side to start the oil flowing.
Next, changing the oil filter:
With the engine still down, slide the oil pan directly underneath the lower unit and remove the gearcase drain plug on the starboard side to remove the old lubricant.
Check the old oil for discoloration or a foamy residue, which is an indication that water could be getting into the lower unit through a damaged seal. The most common cause of this problem is picking up discarded fishing line behind the propeller.
While that gearcase is draining, remove the engine oil filter found on the port side. You can use an oil filter wrench or on these smaller engines a simple strap wrench works fine. Be careful not to disturb the oil sensor located on the block above the filter.
Pete winterizes so many outboards he uses a bulk can of Yamalube® Gearcase Oil with a pump. He threads the fill hose into the drain plug hole and carefully pumps in the lubricant until it starts weeping out of the upper vent.
For DIYers, Yamaha offers two options:
For the next step, Pete uses a portable fuel tank with a small amount of fresh gas treated with Yamalube Ring Free, PLUS EFI Engine Storage Fogging Oil and Yamalube Fuel Stabilizer & Conditioner PLUS. Start by placing a hose flusher over the main lower unit water pickups and turn on the water.
Then disconnect the fuel hose at the fuel filter by loosening the spring clamp with needle nose pliers and connect the hose from the portable tank. Pump the ball to prime the engine and then start, allowing it to run for 10 minutes at fast idle as the mixture is thoroughly distributed throughout the fuel system and combustion chambers to lubricate the injectors, valves, cylinder walls and piston rings.
When the 10 minutes are up, rev the engine briefly until you see a puff of smoke caused by the fogging oil exit through the prop hub and shut it down. Remove the hose from the portable tank and refit the onboard fuel hose.
Leave the engine down to drain the water from the cooling system and disconnect the onboard flushing hose so that it drains, too. Then reconnect.
Tilt the engine up and use a grease gun charged with Yamaha marine grease to lubricate all grease fittings. There is one on each side of the steering slide near the front of the engine, one on the steering column and one on the shift mechanism where the shift cables enter the cowling.
To finish the job, spray the entire engine with Yamashield to repel moisture and prevent corrosion, and replace the cowling.
Replace your fuel filter by unscrewing and putting in the new filter. Dispose the old filter and fuel properly.
Add a fuel stabilizer to your fuel tank to keep the fuel fresh throughout the winter. Stabilized fuel will help make sure that your engine starts quick and easy next spring. It also helps prevent corrosion, rust or other engine damage while in storage.
Last, thoroughly wash and dryyour boat and outside of the outboard motor.
After following these winterizing steps, your engine will be ready to go when spring rolls around.

Back to Blue Life
Winterizing your outboard motor is one of the most important maintenance you can perform as a boat owner. It ensures safe boating in the spring, and also helps to keep your outboard(s) performing well. Making sure that your boat and its engines are properly cleaned and cared for also plays a role in protecting and preserving marine ecosystems.
We always recommend having your engine winterized by a certified Yamaha dealer if possible, but our engines are designed to make the process easy enough for owners to do the job themselves. To help you with DIY winterization, we asked Pete Reils, a certified Yamaha technician at Garden State Marina in Pt. Pleasant, New Jersey to provide steps on how you can winterize your engine(s) yourself.
For more resources, here is a how-to video about winterization.
To follow how Pete does it, keep reading.
HOW TO PREP YOUR OUTBOARD MOTOR FOR WINTER STORAGE
Here are the steps:
-
Change oil & filter
-
Fog the engine
-
Grease fittings
-
Change fuel filter
-
Add fuel stabilizer
-
Wash & dry
Before you get started, put together a checklist of everything you’ll need and be sure you have the proper Yamaha lubricants, additives and filters for the job. A list is available in your owner’s manual and the correct amount of engine oil for your four-cylinder model can be found next to the oil fill cap under the engine cowling.
CHANGE OIL & FILTER
The process starts with changing the crankcase oil:
- First, place an oil pan under the lower unit and with the engine trimmed all the way up.
- Next, remove the drain plug located inside the rubber tube below the rear of the cowling.
- After the oil has finished draining, replace the drain plug.
Pete places a piece of plastic tubing as an extension over the rubber tube to direct the oil into the pan and lowers the engine using the trim switch on the starboard side to start the oil flowing.
Next, changing the oil filter:
With the engine still down, slide the oil pan directly underneath the lower unit and remove the gearcase drain plug on the starboard side to remove the old lubricant.
Check the old oil for discoloration or a foamy residue, which is an indication that water could be getting into the lower unit through a damaged seal. The most common cause of this problem is picking up discarded fishing line behind the propeller.
While that gearcase is draining, remove the engine oil filter found on the port side. You can use an oil filter wrench or on these smaller engines a simple strap wrench works fine. Be careful not to disturb the oil sensor located on the block above the filter.
- Moisten the rubber gasket on the new filter with a little fresh engine oil to assure a proper seal and then install by hand tightening the filter until it is snug.
- Refill the crank case with the proper amount of Yamaha engine oil.
- To refill the lower unit with fresh gearcase oil, first remove the vent screw located directly above the drain plug.
Pete winterizes so many outboards he uses a bulk can of Yamalube® Gearcase Oil with a pump. He threads the fill hose into the drain plug hole and carefully pumps in the lubricant until it starts weeping out of the upper vent.
For DIYers, Yamaha offers two options:
- An inexpensive hand pump that fits quart bottles of the Yamalube Gearcase Oil and works exactly like Pete’s bulk pump system
- A plastic tube with threads that match the drain hole so you can simply squeeze the lubricant into the gear case.

FOG THE ENGINE
For the next step, Pete uses a portable fuel tank with a small amount of fresh gas treated with Yamalube Ring Free, PLUS EFI Engine Storage Fogging Oil and Yamalube Fuel Stabilizer & Conditioner PLUS. Start by placing a hose flusher over the main lower unit water pickups and turn on the water.
Then disconnect the fuel hose at the fuel filter by loosening the spring clamp with needle nose pliers and connect the hose from the portable tank. Pump the ball to prime the engine and then start, allowing it to run for 10 minutes at fast idle as the mixture is thoroughly distributed throughout the fuel system and combustion chambers to lubricate the injectors, valves, cylinder walls and piston rings.
When the 10 minutes are up, rev the engine briefly until you see a puff of smoke caused by the fogging oil exit through the prop hub and shut it down. Remove the hose from the portable tank and refit the onboard fuel hose.
Leave the engine down to drain the water from the cooling system and disconnect the onboard flushing hose so that it drains, too. Then reconnect.
.jpg "8O6A8023-(1).jpg")
GREASE FITTINGS
Tilt the engine up and use a grease gun charged with Yamaha marine grease to lubricate all grease fittings. There is one on each side of the steering slide near the front of the engine, one on the steering column and one on the shift mechanism where the shift cables enter the cowling.
To finish the job, spray the entire engine with Yamashield to repel moisture and prevent corrosion, and replace the cowling.

CHANGE FUEL FILTER
Replace your fuel filter by unscrewing and putting in the new filter. Dispose the old filter and fuel properly.

ADD FUEL STABILIZER
Add a fuel stabilizer to your fuel tank to keep the fuel fresh throughout the winter. Stabilized fuel will help make sure that your engine starts quick and easy next spring. It also helps prevent corrosion, rust or other engine damage while in storage.

WASH & DRY
Last, thoroughly wash and dryyour boat and outside of the outboard motor.
After following these winterizing steps, your engine will be ready to go when spring rolls around.
Back to Blue Life